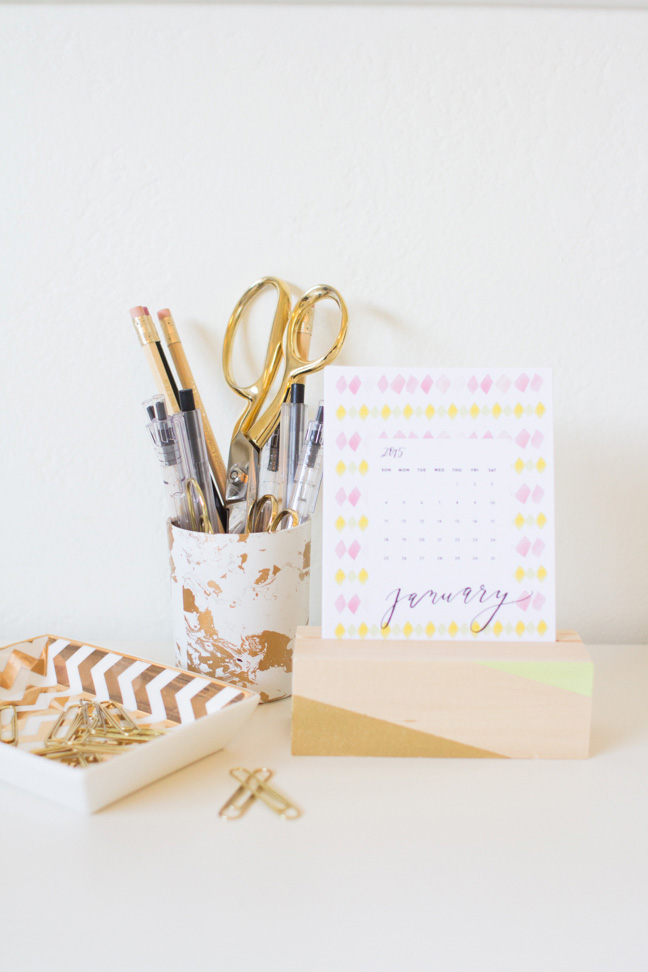
I love switching out the calendars in our house every January. There is something exciting about getting a new beautiful picture each month to help you keep track of the passing days. This year, I decided to make a wooden desk calendar base to display each month by my computer. It’s a simple project (although you do need a few power tools), and the best part is that you can keep using it year after year.
Supplies:
- block of wood
- miter saw
- circular saw
- clamps
- sawhorses
- sandpaper
- card stock
- paper cutter
- masking tape
- craft paint
- downloadable calendar PDF from This Little Street & Coco + Mingo
Instructions:
Step 1: Print out your calendar onto white card stock. This Little Street developed this beautiful calendar download with Coco + Mingo this year, and I couldn’t pass up using it here. The PDF is sized at letter sized paper, so when you go to print it shrink it down to print at 4 inches by 6 inches.
Step 2: Cut out each month of your calendar using a paper cutter. Trim the images with a small border around the top three sides and leave about a half an inch of white space on the bottom edge.
Step 3: Take your block of wood and mark it where you plan on cutting. Trim its length to 5 inches, and make a line down the center lengthwise where you will be making the long cut. I used a small block of carving wood that I got at Michaels, but you can easily use any scrap wood you have at home, or even a piece of birch wood could be very pretty.
Step 4: Using your circular saw, set the cutting angle to 15 degrees and the cutting depth to half an inch. Secure your piece of wood between your two sawhorses using a couple of clamps so that it makes a flat plane to cut on. If your clamps are large enough, you could easily clamp it to the side of your work table instead. Once the wood is secure, make a lengthwise cut with the circular saw. You may need to make two passes so that all 12 sheets of card stock will fit in the groove.
Step 5: Trim the length of your wood to 5 inches using your miter saw.
Step 6: Sand all the edges of your block of wood to get rid of any splinters or imperfections.
Step 7: Mask off a strip of your wood with tape.
Step 8: Paint the exposed wood on the front edge with craft paint colors of your choosing.
Step 9: Slide your calendar sheets into place, and now you have a beautiful calendar to help you keep track of the seasons!
More DIY Home Office Ideas:
