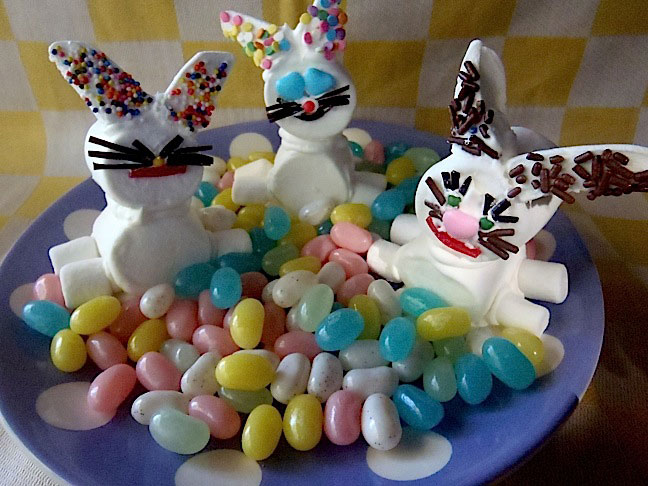
These are just fun and cute! I love this “recipe” because not only are these Easter Bunnies charming, but your child can give each one a different personality –just as you would a Halloween Jack-o’-Lantern.
And it’s a craft project that can also start a discussion about feelings! Are you going to make a happy bunny? Why is the bunny laughing? Why is the bunny sad?
These bunnies are delicious to eat, and they also make a very sweet centerpiece for your Easter table. You could also put one at each table setting as a dessert or favor!
Ingredients:
- 1 1/2 ounces egg whites (about 1 1/2 egg whites)
- 2 cups powdered sugar
- 2 1/2 dozen large marshmallows
- 5 dozen small marshmallows
- Candy assortment: sprinkles, licorice rope, jelly beans, etc.
Preparation:
Makes about 1 dozen bunnies
To make the icing — which will be the “glue” holding your bunny together — use a standing mixer or hand mixer with whisk attachment. Add the egg whites to the powdered sugar. Start on low to combine and then turn up to high and whisk until the mixture is thick and stiff, about 5 minutes. Cover with plastic wrap and set aside.
Each bunny will require 3 large marshmallows, 5 small marshmallows, a variety of candies, and a bit of the icing.
To make the bunny ears, cut a large marshmallow in half and then cut each half into 2 triangles. Cut 24 ears and set aside.
Place some sprinkles on a flat plate and cut a bit of licorice rope into small pieces for whiskers and mouths. Set both aside.
Start building your bunnies on a plate or platter. Use a teaspoon to put a small amount of icing on the plate. Place one large marshmallow on its side in the icing. Then spread a bit of icing on the top of that marshmallow and put another large marshmallow on top of that, in the same direction.
Place the sticky part of the ears down into the sprinkles. Then spread a bit of the icing on the top front of the top marshmallow in order to attach the two sprinkle-covered ears.
Use a very tiny spreader or even a toothpick to add icing to the side, circular portion of the top marshmallow. This will be your blank “canvas” where you can place candies of your choice to make a face. (If it’s easier, you can make the face first, before assembly.)
Use a bit more icing to attach two of the small marshmallows on each side of the bottom marshmallow for the feet and one to the back of it for the cottontail.
For presentation, it’s pretty to add a bunch of different colored jelly beans to the plate, between the bunnies.
Check out the how-to video here.


